Though now discontinued, the K1 and its modular cousins enjoy continuing popularity on the second hand market. Setting this synth up for multitimbral sequencer use is straightforward — when you know how.
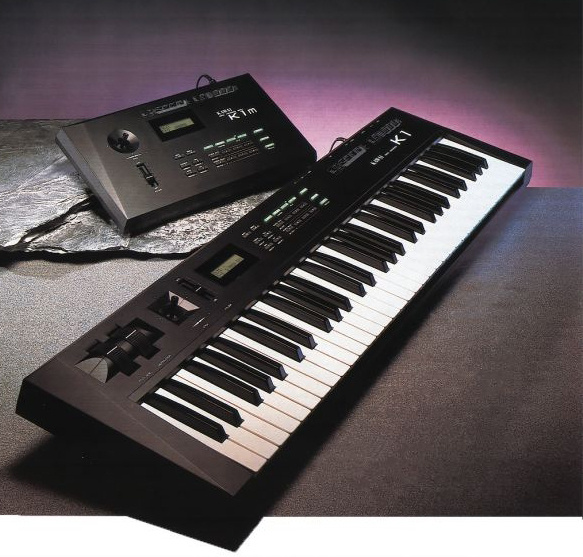
Since its introduction in 1988, Kawai's K1 has proved to be an immensely popular budget synth. An 8‑voice multitimbral machine offering 16‑note polyphony, it's an obvious choice for anyone on a budget and using a sequencer. The introduction of modular and rack‑mounting versions — the K1m and K1r — only increased its popularity, and though it may be a little long in the tooth now, there are still many musicians who appreciate its characteristically warm and breathy sounds.
Though the manual isn't entirely clear about how you should set up the K1 to work with a sequencer, the trick is to configure a dedicated Multi patch which you select before starting work. The steps for setting up a such a Multi patch are as follows:
1. Select the memory location that you're going to use as your sequencer patch. This needs to be a Multi patch, and the most obvious one to chose is MULTI IA‑1. This is the first Multi patch to appear on the LCD when you press the Multi button, and so using this as your sequencer patch simply saves you from doing any unnecessary button pushing when you power up your studio.
2. Press the EDIT button. The overall volume of the patch is displayed. This should be increased to 100 by pressing the + button. Press EDIT again and you can start to create a name for your patch. The cursor is under the first character of the current name, and this may be edited using the +/‑ buttons. Each time EDIT is pressed, the cursor moves along one character; naming patches is always a tedious process, but it's still worth doing. What you call the patch is up to you, of course, but I generally go for something startling like 'Sequencer'.
3. Press button C once. At this point you're going to need to decide how many voices you want the synth to play. The K1 is 8‑voice multitimbral, so logically you'll want the synth to respond to eight different MIDI channels. It may be, however, that you don't have enough spare channels to allow this to happen; the last thing you want is a synth responding to MIDI commands directed at a totally different module, so you need to decide how many voices you want your K1 to have. Once you've made the decision, it's simply a question of pressing button '1' and then pressing the '‑' button until the number 1 appears on the far left of the row of dashes at the top of the LCD and 'VR' appears at the bottom right hand corner.
For the time being you can ignore the patch name displayed at the bottom left of the screen. VR stands for 'variable', and this setting makes the best use of the machine's polyphony by allowing the 16 notes to be shared between the various voices according to need. Pressing the + button will display numbers from 1 to 8, and in this way it's possible to reserve a specified number of notes for any one voice. Though this can be useful at times, VR is still the best bet for sequencers.
Having set up the basics for the first voice, we do the same for the second. Press '2' and then the '‑' button until a '1' appears instead of the second dash, and VR is again displayed at the bottom right hand corner. Each '1' represents a voice in the synth, so repeat the process until you have as many '1's displayed as you need — up to a maximum of eight.
4. Press button C a second time. The top row of figures shows the MIDI channel that each voice will respond to. Obviously each one needs to be different and, unless your setup precludes this arrangement, I'd recommend setting voice 1 to channel 1, voice 2 to channel 2, and so on. This is achieved by pressing button 1 and then the +/‑ buttons until a figure 1 is shown at the far left of the top row of figures of the screen. Next press button 2 and the +/‑ buttons until a 2 is shown in the second position and repeat the process as often as is necessary for your setup.
5. Most multitimbral synths are best thought of as several synths bundled into one box. During any editing process, an individual number button is pressed to identify any one 'synth' in the bundle. Once this is done it can be edited, and then the user can move on to the next synth in the bundle. For the sake of brevity I'm not going to talk you through the editing of each voice since the procedure is identical in each case — from now on I'll assume that you'll repeat each editing process as often as is necessary for your setup.
6. K1 owners (as opposed to K1r or K1m owners) need to press C one more time and then use the +/‑ buttons in order to select the appropriate receive mode. There are three options here: Keyboard, Mix and MIDI. MIDI is the option you need, so select it and then repeat the process for each voice.
7. Press D to display the Transpose value and edit each voice to display the value 0. Press D again to display the Tune value and, again, edit each voice to display the value 0. Press D again to display the Level of each voice and edit each to the value 100. The K1 will respond to Controller 7 (volume) commands which can be generated from a sequencer, but as a starting point it's best to have the machine turning out as much volume as possible. Pressing D a fourth time displays the output that each voice will use. Hopefully you'll be making use of both output sockets on the K1, and for maximum flexibility, any one voice should be routed to only one of those sockets. I tend to route odd numbers to the left socket and evens to the right, but it doesn't matter what system you use as long as you've got one, and remember what it is!
8. Press B to display the lowest note command that the voice will respond to and edit it to C2. Press B again to display the highest note command that it will respond to and edit it to G8. Press B again to display the kind of velocity commands the voice will respond to and edit it to show 'ALL'. In common with all modern synthesizers, the K1 will respond to program change commands. This means that the beginning of a piece of sequenced music can contain a number of commands which will change each of the voices to whatever patches are required. This is obviously very handy but it's still worth setting each of the voices to a specified patch which the machine will default to before any sequencing takes place. I like to have a piano on voice 1, a flute on 2, strings on 3 and so on, but the choice is up to you — press a and then set the patch up to your requirements.
9. When you've finished editing your sequencer patch it still needs to be saved, since switching off the machine at this point will erase all your work. Simply press 'Write' and then 'Yes' two times (not too quickly) and your work will be safely stored away. You've now got a sequencer patch!
10. Having set up the patch you may also need to look at some of the global settings on the machine. Press the System button and turn to the Receive menu by means of the +/‑ buttons. You need to set all the options to On except for 'MIDI Omni' which should be off, and 'Receive Program' which should be set to 'Sect'. This latter function allows the machine to respond to program change commands by changing individual voices within your Multi patch rather than actually changing to another Multi patch. There's no need to save the global settings, since the machine automatically defaults to whatever settings are chosen.
That's it — there's nothing to do now but get down to making some music!