 Michael Robshaw, whose self-recorded track is the subject of this month’s Mix Rescue.Photo: George Yonge
Our engineer transforms a bedroom-recorded rock song into release-ready territory.
I was approached to mix singer/songwriter Michael Robshaw’s self-produced ‘My Friend Called Jai’. I liked the song, and it already sounded pretty good, albeit unready for public consumption — the overall tonal balance was a bit off, there were issues in mono, and the live drums sounded ‘replaced’ and boxy, but there were no obviously insurmountable problems. Listening to the multitracks, though, I identified some serious challenges, mostly due to every element, including a live drum kit, having been tracked in Michael’s bedroom using an inexpensive interface and a handful of affordable mics.
I really only want to remix a song if I believe I can achieve a release-quality finish, so, realising this would take time, I contemplated politely passing on the opportunity. I spoke to Michael about my concerns and offered to try and help steer his own mix. Michael is enthusiastic and persuasive, though, and during our conversation I agreed to give it a go — I quite liked his suggested narrative that it would be interesting to see just how close you can get to a commercial production when tracking a band in a small bedroom...
Surveying The Scene
I listened again to the multitracks to decide what would benefit most from my immediate attention and what would need more detailed work, and generally to plot a path that would allow me to mix the track. The drums presented the biggest obstacle to my mix convincing anyone it was the real deal; they’d need drastic work, as I’ll explain later. I thought the track had a great bass line, and I figured that this could drive the track along nicely if it were properly presented, though there was something a little odd about the recording. Checking it on an EQ’s frequency analyser confirmed my suspicion that, despite being played with a pick, the sound contained almost nothing above 1.5KHz. It would be challenging to give the instrument enough impact in the mid-range that it wouldn’t completely disappear on smaller speakers and mobile devices. Thankfully, though, the lower frequencies were solid, and it felt appropriate to have a fairly generous bottom end on a guitar-based production like this.
Stimulating Bass
You can’t use EQ to boost frequencies that aren’t there; instead you must find a way to add new information that relates to what does exist. My main tactic for the bass was to try and isolate the highest frequencies on the bass (1-1.5 kHz, as it turned out) and apply an Aural Exciter-style process on them. Duplicating my bass track, and then using high- and low-pass filters to narrow in on the mid-range on the copy, I applied distortion and saturation-type effects to ‘excite’ the upper-mids. This sounded promising in isolation, but didn’t help a huge amount in the context of the track. My next tactic, then, was to re-amp the bass track, which involves sending the signal back out to an amp and the re-recording it back into my DAW. You can do this in software but I prefer using real amps, and have a 500-series Radial EXTC which makes this very quick and easy.
 Despite being played with a plectrum, the bass guitar had little content above 1.5kHz.
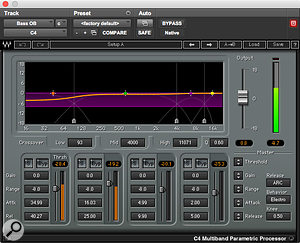
I spent 10-15 minutes miking up a bass amp and playing with the settings. Cranking the amp’s high-mid controls seemed encouraging, and as well as helping the bass cut through a bit, it also seemed to even out the bass sound usefully. As I was recording the bass back into Pro Tools, I took the opportunity to use a Grove Audio Liverpool valve compressor I had in for review to give it a generous squeeze. I also gave the low end a little boost around 60Hz with my Warm Audio Pultec-style EQ. With the bass back in the digital realm, the final touch was to use a multi-band compressor to hold down the bass’s low end, without affecting my precious new mid-range content.
Vocal Moods
 The Slate 1176-style compressor was used heavily on the lead vocal, but with the parallel ‘mix’ knob dialed back. The lead vocal was strong: I liked that Michael wasn’t afraid to have it ‘loud and proud’ in his mix, and it was complemented by some tasteful ‘stacked’ backing-vocal harmonies. I felt, though, that a decision was required about how hard-hitting the vocals (and the song in general) wanted to be. This is a guitar pop track at heart but, despite Michael’s measured delivery, I was keen to see if I could influence the mood at all — to give it a touch more attitude. My primary tool for this was compression, but I also wanted to use effects to build some sense of ‘space’ around the vocal — part of my wider aim of giving the track extra depth to help get it out of that bedroom!
With Michael’s help, I’d picked a couple of commercial reference tracks to help me when shaping the mix — and the notion that I might be over-compressing the lead vocal was dismissed when I heard just how ‘pinned down’ the vocals were in the up-to-date references! I’d hit the vocal pretty hard with an 1176-style compressor plug-in but I tempered this via the wet/dry mix knob, to find a balance that worked in the mix. I was pleased with how this seemed to ‘toughen up’ the vocal a little and, like or loathe it, the heavy compression certainly made things sound more contemporary. Using any amount of aggressive gain reduction on a lead vocal can be a balancing act, as it often creates unnatural artifacts that need controlling with detailed automation, or a de-esser. To be honest, I find presets can be an excellent place to start with these sorts of plug-ins, and it’s really then a case of trial and error; until you find the right area of the vocal to bring under control, and by how much.
 The Fabfilter Pro-DS was then used to control some sibilant side effects from the heavy compression.
Drum Talk
What about those drums, then? While there were significant issues I had to overcome, note that I’m not being critical of Michael — most of the problems were a direct consequence of his having to record in a bedroom environment; his performance was great. The two overhead mics had captured a good sense of cymbal spread, but the level ‘collapsed’ when listening to the tracks in mono — a common issue if you place your overhead mics too far apart. The snare was also out of phase in relation to the overheads, and there was a large amount of unpleasant, boxy, low-mid room sound to contend with.
 Drastic EQ was required on the drum overheads in order to remove the unpleasant boxy-sounding low frequencies.
 Pro Tools’ bundled Time Adjuster plug-in was used to correct the snare’s phase relationship with the drum overheads.
 One band of the Waves C4 Multi-band Compressor was used to control the low-bass — without suppressing the mid-range. I time-aligned one of the overheads slightly in Pro Tools and, after flipping the polarity, the snare sounded more focused. Then, I ‘got savage’ with an EQ on the overheads, removing almost everything below 500Hz to leave me with little but the cymbals and the top end of the other drums; I could have quite happily gone even higher, but the cymbals can get very shrill sounding without at least some low-frequency undertones to balance things out. I also found that increasing the ‘sustain’ of the remaining content with a Transient Designer plug-in helped enhance the impression of space around the cymbals. I’d now need to put the effort into fashioning a believable drum sound from the close mics...
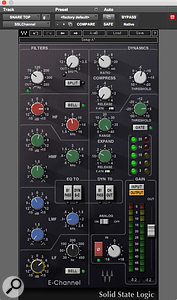
My task was hampered in a couple of ways. First, Michael had printed triggered samples on the kick and tom signals, and while it’s easy to trigger drum samples nowadays, if you care about it sounding like a real kit you have to massage them into place very carefully. Second, while too much hi-hat spill on a snare recording is a common problem, it was particularly bad here. I’d certainly need a snare sample, but after a lot of trial and error, I was shocked at how much EQ and general processing I was able to throw at the real thing: while I’m comfortable with the ‘it takes what it takes’ approach, just to get started on the real snare I’d applied a 9dB boost at 7kHz, a 6dB cut at 420Hz and a 6bB boost at 200Hz! Blended with a sample (around 60/40 in favour of the real snare), I applied further amounts of generous EQ on a snare bus channel, as well as to the whole kit. I’d also used two layers of gating to bring the spill under control, along with another instance of the Transient Designer plug-in to help reduce the ‘roaring’ hi-hat spill on the snare.
 A generous helping of EQ was used on the ‘real’ snare drum.
  Waves E-Channel EQ was applied to the snare top.I applied similar amounts of processing to the kick and toms, and found myself completely replacing the ‘replaced’ kick sample with one I felt sat better in the track.
I was pleased with where I’d managed to take things, but it had required quite a draining amount of work. Interestingly, though, I’d found an enforced period of headphone mixing to be quite handy at this point in the process — the extra detail, especially in terms of the space around an instrument, proved helpful as I rebuilt the drum sound. The original recordings were dryer than a very dry bone: any space you can hear in the examples was introduced entirely via a roomy snare sample and a small amount of plate reverb.
Guitars
Had the guitars not sounded right, I’d probably not have taken on the mix, as I don’t think I could have ‘rescued’ a mix of this nature without them. Thankfully, Michael had evidently given this lots of thought at the recording stage. There were several guitar parts to play with, including double- and quadruple-tracked rhythm sections and some really nicely played melodic parts. They’d all been recorded through a real amp, and sounded pretty respectable so, tonally, they required relatively little work other than some shaping EQ and a few very focused notch cuts to remove a bit of harshness and unwanted resonances.
That said, the distorted parts (particularly the two main rhythm guitars) lacked depth, which I suspected could be due to the amp volume being set very low (somewhat inevitable when recording in a domestic setting). Worse, these two guitars almost completely disappeared when I listened in mono. Clearly, these elements would benefit from some more involved work; I really wanted them to have the feel of being played through a larger guitar cab that had been cranked up a bit.
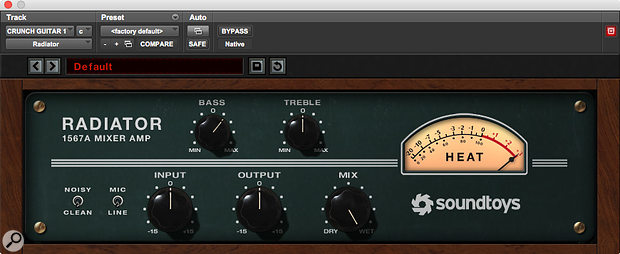
After experiments with EQ and compression, I found something along the lines of what I wanted when I combined a little saturation with very short delay effects, which seemed to add low mids and create a sense of depth. When deciding where to position the guitars, I took my cue from Michael’s mix. That may strike you as obvious, but it’s easy to lose sight of things like this when you’re reworking things so extensively; it’s well worth paying attention to demo decisions when mixing a track for somebody else. Even if the rough mix is poor in your opinion, there’s nearly always information in there that can help you please your client.
 Saturation and delay were used to create the impression of a large-cabinet guitar sound.
Developing The Mix
With things broadly taking shape, I was beginning to think I might just be able to pull this one off, and the job now was to balance what I felt were the production’s sonic strengths against the needs of the song. It can be difficult to remain truly objective at this point, especially with mixes that required a large amount of restoration work before considering the overall balance. So, as Michael and I weren’t in any great rush with this mix, I decided to focus on other projects for a while; I’d return to the mix later with something like fresh ears!
Coming back to the project after a few weeks, my satisfaction with all that work on the drums was gone in a flash. They weren’t bad, just not as wonderful as I’d remembered, and after few futile attempts to improve things I accepted that they were probably as good as they could be, and so in the final mix I ‘tucked them in’ a little more than I normally would — they were doing what they needed to do without drawing too much attention to themselves.
Body & Depth
It’s worth mentioning some general strategies I used to help give the track as a whole more body and depth, and feel more... let’s say ‘analogue’. I experimented in a fairly heavy-handed way with a number of instances of Slate Digital’s Virtual Tape Machine plug-in, putting it on nearly every channel... by which time my computer started to wave the white flag. This was combined with an accumulation of subtle saturation stages on the subgroups for all elements of the mix, including the effects returns. It’s difficult to articulate precisely what this type of processing contributes to a mix, but I certainly find that such a ‘little but often’ approach creates a more dramatic effect on the mix as a whole. If you’re interested, have a listen: you can find a version of the mix with and without all the tape-style plug-ins in the accompanying Zip file on the Sound On Sound web site.
 Several instances of the Slate VMS plug-in were used across the mix.
As I moved into the later stages of the mix, I was mostly able to shake off any misgivings about the drums, and enjoyed a short creative period during which I fine-tuned guitar and vocal levels. I mentally disciplined myself from touching the drums any further and made a point of introducing some small amounts of automation throughout the song, to add some movement and dynamics.
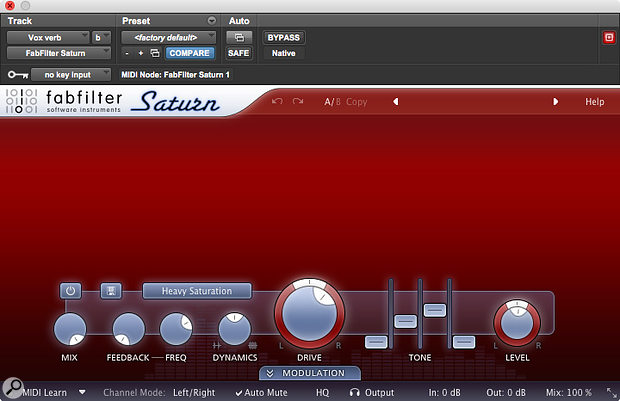
 Numerous but small amounts of saturation style plug-ins were used on the mix, including the Fabfilter Saturn on the main Reverb return.
Mono Trouble
There were a few issues I had to decide if I was going to live with, though, with the most pressing of these being what happened when I hit the mono button. Every mix needs to work when listened to in mono (not only does the world’s best-selling DAB radio only have a single speaker, but various streaming services deliver something very close to mono too), but that doesn’t necessarily mean that the mix should sound identical in stereo and mono. There were such differences here — the drum overheads and rhythm guitar levels reduced quite dramatically in mono.
There are a few things you can try to counter this — checking polarity of opposition panned parts, reducing the width of your stereo panning, and filtering/processing to create more of a ‘difference’ between the two stereo elements can all help — and I certainly tried what I could. I think I struck the right balancing here, given the source material: because the drum sound isn’t hugely reliant on the overheads, it’s still respectable enough in mono, and there’s enough else going on that the mix holds its own when the wide-panned rhythm guitars drop down.
Wrapping Up
I did a lot of work on this mix, and could have filled a book describing the details — I haven’t even mentioned my liberal use of multiband compression and how much processing I had on the mix bus. But before I sign off, it’s worth reflecting on the process of bringing this mix to a close, because it was a fine balancing act. What struck me most in the later stages of this project is that, while you can dramatically alter the sound of recordings, and even get surprisingly good results in isolation, knitting together a number of such radically treated elements can be a real challenge — it certainly took much longer than I’d typically want to spend on a mix project. Perhaps that’s a case of getting too attached to processing decisions, such that it’s harder to see the wood for the trees? Thankfully, though, when I finally saw fit to hand it over, Michael’s warm response made my efforts feel worthwhile: we’d taken a good song and made it ready to hold its own out there in the world.
Home Or Pro Studio Recording?
The way some artists talk, it’s almost as if they feel like they have to record things themselves these days and that it’s also relatively easy to get professional-sounding results in a bedroom or other domestic setting, whatever the genre. I’m not saying it’s impossible by any means, and I’ve heard some stunning recordings done in this way. But for more ‘band’ type projects, I can’t help thinking that some tactical use of a more traditional studio setting at the recording stage would both save significant time and energy at the mix stage, and elevate the final result.
For example, if you are working on a track as a budding producer, in a similar scenario as Michael, you could hire a local studio for a half-day to record the drums for relatively little outlay. Yes, I know... as a studio owner, I would say that! But I’m serious: as well as helping to keep studios in work, you should get solid recordings to work with, and it could also make for both an interesting and an educational experience; you could also use the time to pick the brain of the engineer, get to know different mics, and maybe also make a useful contact for mix critique, future projects, or even a bit of work experience. I’d probably place that above adding another budget mic to my collection!
Rescued This Month
Michael Robshaw is an up-and-coming singer/songwriter based in Cambridge and Leeds, and has been influenced by a diverse list of artists including the Script, Muse, Bombay Bicycle Club and Biffy Clyro. As well as working on his own music and playing regularly across the UK and Europe, Michael enjoys songwriting, collaborating, recording and producing songs for other artists.
Audio Examples
Download the Zip file which contains all the audio examples that accompany this article:
Download | 91 MB
