We overhaul Bristol band Taxi's mix sound in search of punchier drums, meatier guitars, and a more polished lead vocal.
This month's Mix Rescue candidate, Rob O'Neil, by chance happens to have already appeared in our Studio SOS column back in December 2004. He had asked me if I could help him transfer a project from multitrack analogue tape to hard disk so that he could mix it at home. Rob had used a Tascam one-inch, 16-track tape machine and a Soundcraft analogue mixer in a local college studio to record his band Taxi, as he wanted to hear firsthand whether tape warmth was a reality or just an old wives' tale. However, that meant he had to do an analogue-to-digital transfer of the end result so that he could mix the songs at home using his PC-based Cubase system.
I suggested that he copy all his tracks over to the college's Alesis HD24 ADAT machine, then bring just the drive to me so that I could use my Alesis Fireport to transfer the files to DVD-ROM. We did exactly this, but when Rob played me his final mix, it lacked both punch and clarity, despite being well balanced, so I asked him if he'd like me to have a go at it as I still had his audio files on my machine. Rob was more than happy to give it a try so I scrutinised the original tracks to see if any of his problems related to the source material.
Source Problems
Essentially the recording included tracks of bass, guitar, drums, and vocals, with one further track of guitar overdub. The drums had been recorded in the traditional way, with close mics plus a stereo pair of overheads, and the guitars had used miked amps rather than DI devices. Aside from a little audible tape hiss and some inappropriate crunchy distortion on the first guitar part (possibly clipping), the recordings were clean enough, but the kick drum track sounded very wrong. I don't know if this was a tuning problem or a mic-positioning issue, but the sound had no punch at all and was lacking any real definition. Given that Rob had recorded with an AKG D112 — normally an excellent choice for kick drum — I suspect that the problem was down to placing the mic too centrally inside the drum shell, and too close to the beater. It is also possible that too much damping material was used inside the drum, but this is pure speculation.

 The greatest challenge presented by the recorded drum parts turned out to be the kick-drum track, which had no real weight or definition at all. Tackling this with compression and equalisation required drastic measures, as you can see from the screenshots!Another problem that came to light was that the drum overhead tracks were, for some reason, out of phase — a faulty cable or an inadvertently pressed phase button was to blame I'd guess. As soon as I panned them to stereo I got that horrible feeling reminiscent of having your ears sucked out with a sink plunger — a sure giveaway! For confirmation I panned both tracks to mono, soloed them, and discovered that all the low end had gone. Putting a phase-inversion plug-in into one channel brought about a magical transformation, and all the missing detail and low end returned.
Next I checked the tom tracks and found that only two of the three toms had been hit during this particular song — one track was just spill, so I muted it completely. The remaining two tracks exhibited the usual spill you expect to hear on tom mics, where the tom heads ring and boom every time the kick drum is hit. Applying a gate to each tom track cleaned these up acceptably, with the odd hint of snare drum still breaking through, but as the toms weren't played very often, I decided to go one better and manually mute everything that fell between tom hits. I could have used level automation for this, but decided instead to do it destructively using Logic 's Sample Editor window, as this would allow me to apply a fade to the end of each tom hit section to avoid any abrupt level transitions. With less than ten or so hits on each tom, this took only a few minutes and significantly cleaned up the overall drum sound. I felt the snare-drum sound lacked any real edge, but other than that it provided a good basis on which to start. Luckily there was no spill between the drums and guitars as the guitar amps had been set up in separate rooms.
The guitar parts were both fairly overdriven, but not excessively so, although I'd have recorded one of the parts using a cleaner amp setting given the choice. Still, I didn't anticipate any serious problems here. The bass guitar was also fairly clean and punchy, so I felt a little EQ and compression would be enough to make it sit properly in the mix. Rob's vocal was clean and free from spill, so, again, EQ and compression should be enough to get it sounding right, after which I could choose a suitable reverb.
Rescued This Month...
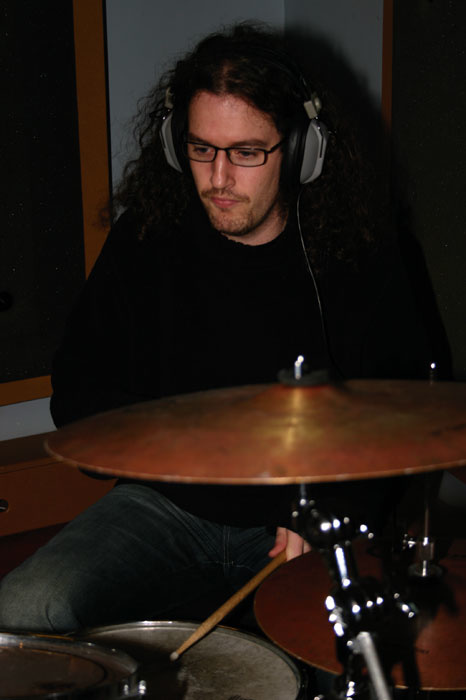
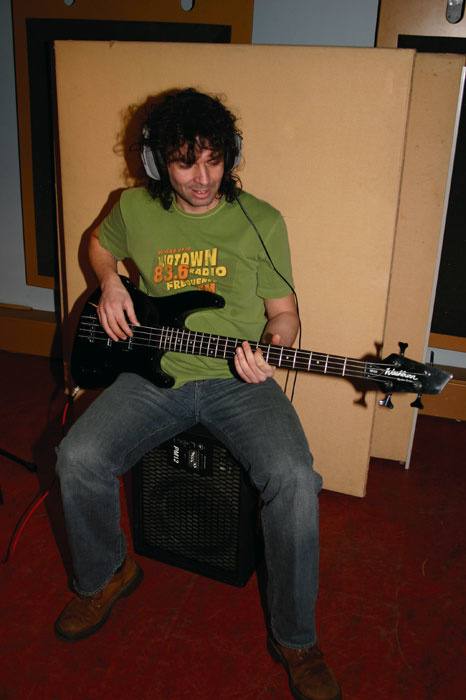
 Taxi formed back in May 2004, and have since been writing and performing songs influenced by classic bands such as Free, Led Zeppelin, Queen and Cream. The band is made up of Rob O'Neil (vocals, bass guitar), Matt Woosey (vocals, guitar), and James E-Williams (percussion), and they have already appeared on Kerrang FM and BBC Radio.
Resurrecting The Kick Drum
As the kick drum sounded like a cheap suitcase being thrashed with a partially thawed haddock, I decided to tackle that first and came up with a variety of solutions, including one that combined Logic 's sub-bass generator with gentle distortion, compression, EQ, and psychoacoustic enhancement to bring back the low-end punch and the beater 'click'. However, as I've already used Logic 's SubBass plug-in on a few previous mix projects now, I was determined to find another solution. In the end I got very close to the sound I heard in my head by just using very heavy EQ and basic compression. However, the EQ setting ended up being pretty radical, as you can see in the screenshot, so let me explain how I got there.
 The bass guitar recording needed only a little high-end roll-off to reduce some fret rattle, along with a couple of small peaks to bring out the mid-range tone.The kick needed a lot more low-end punch, but if you simply boost with a low shelving filter, you end up increasing all the subsonic energy that you can't hear along with the rest of the sound — that just eats up headroom. To try to prevent this, I used a low-cut filter with a very steep 48dB/octave slope and a 47.5Hz cutoff frequency, but I turned up the Q value of the filter so that it would give me a resonant peak at about the right place to bolster up the weedy low end of the kick. On top of this I used a shelving filter set to 54Hz and boosted by a whopping 16dB, which, in combination with the low-cut filter, gave me that much-needed 50Hz hump with a sharp cutoff below around 40Hz. I also needed more definition at the high end, so I applied a fairly wide boost centred at around 8kHz. This took care of the extremes of the kick spectrum fairly well, but there was some nasty mid-range boxiness still to be dealt with, and this turned out to occur at three main frequencies — 200Hz, 415Hz and 1kHz — all of which I had to notch out using parametric sections.
Finally, I set up the compressor with a 5mS attack time to allow the leading click of the kick to punch through, and with just enough gain reduction to keep the level even. Although I tried gating the kick, I found that the spill caused no obvious problems once the other mics were added in, so I decided against it. It was also necessary to fine-tune the EQ with the overhead and snare tracks playing, as the kick spill into these mics affected the overall kick sound. As you can hear if you check out the sound files, the transformation was remarkable.
Snare & Overheads
To treat the snare, I gated it to reduce the level of spill by 12dB, and then used Logic 's Exciter with a frequency of 3.5kHz to synthesize some top end, which gave it much more definition. A little added plate reverb gave a very respectable snare sound. Normally I roll some low end out of the overhead mics to stop them interfering with the sound of the close mics, but in this instance the sound gelled better with the overheads left wide open. Now that the phase problem had been sorted out, I panned the overheads left and right, but not too widely, as that can sound unnatural. Last came the toms, which needed no EQ or compression to make them sit nicely in the overall drum mix, now that I had edited out the unwanted sounds. I just panned them very slightly to match their positions in the kit.
Once I had a drum balance, I routed the drums to a subgroup and applied overall compression as well as Noveltech's Character plug-in to give the whole drum mix more definition. I tried to achieve the same thing using only EQ to lift the high end and got an acceptable result, but Character sounded subjectively better to me, so that's what I went with.

For drum reverb, I used Logic 's Space Designer convolution processor with an impulse response from the Drum menu that went by the name of Skindrum Room. Other than rolling off the low end below 200Hz, I didn't modify this in any way, and applied it to all parts of the kit other than the kick. There was enough kick spill in the overheads for the reverb to give the kick a sense of belonging to the same space as the rest of the kit.
Guitar & Bass Polishing
I didn't want to mess with Rob's bass-guitar sound too much, so stuck to EQ and compression, using the EQ to roll off the high end above around 5kHz, so as to diminish fret rattle and other string sounds without significantly changing the essential character of the bass. I also added a couple of little humps at 310Hz and 1.26kHz to bring out the mid-range tone, but that was pretty much it. Rob goes for a fairly raw bass sound with a bit of edge to it, and I didn't want to tame that too much.
 A variety of processes were used to bring out the best in the guitar parts. The Waves Guitar Amp plug-in's speaker modelling softened some unpleasant clipping distortion, and then a pair of dynamics processors, keyed from the lead-vocal part, ducked the guitars during vocal phrases — this allowed the guitars to be mixed loud without compromising vocal intelligibility.My next job was to polish up the guitars, and I needed to get rid of that edgy distortion on the first guitar part. A simple way to do this was simply to pass the signal through the Waves Amp plug-in using just the speaker-cabinet modelling. The high-cut built into typical guitar speaker-cabinet models tames fizzy distortion and mild clipping quite well, and in this case also affords a useful degree of tonal control. No compression was needed for level-control purposes, as distorted guitars tend to have a pretty even level anyway, but I did use compressors set up as duckers in both guitar parts. These had their side-chains fed from the vocal track, and I initially adjusted the threshold to give around a 6dB level drop while Rob was singing. This enabled the vocals to punch through easily, even though the guitars were still high in the mix the rest of the time. I felt that the ducking was still too audible at this point, so I backed the compressor gain reduction off to around 3dB, and then inserted a gate after it, also set up as a ducker — the latter lifted the guitar by precisely 2dB when there was no vocal present. The combined effect turned out to be much smoother sounding, but it was necessary to juggle the compressor and gate release times to get the gain change happening at a suitable rate. When soloed, some gain pumping was evident in the guitar parts, but in the context of the mix this actually added energy to the sound.
As a final guitar treatment, I used the Drive control in the PSP Audioware's Vintage Warmer to thicken the sound, which it did beautifully. If you don't already have this plug-in, you should get it, as it is one of the best low-cost mastering and track-processing tools I've come across. The second guitar was treated in exactly the same way, except that conventional EQ was used instead of the amp simulator in order to roll off excessive highs and lows, and to apply a little lift at around 4kHz to give the guitar some bite. The two parts were then panned left and right, but again not too radically.
 A little low-end popping on the lead vocal was easily dealt with using low-frequency EQ cut, and a decibel or two of lift at 9.6kHz increased the feeling of 'air' around the singer.
Vocal Tweaks & Buss Processing
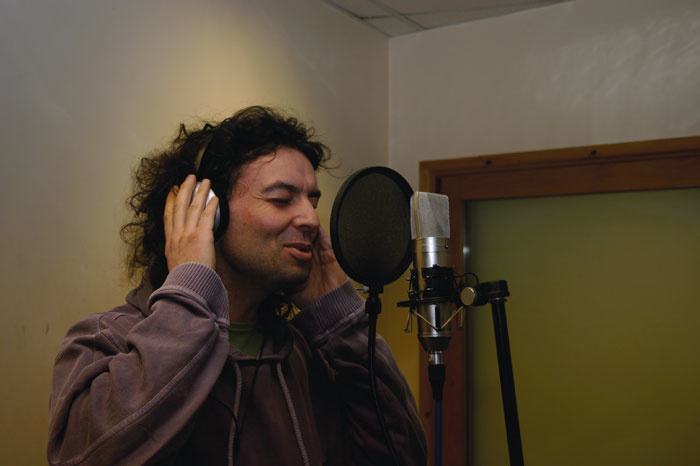
That left Rob's vocal, which I gated to reduce a little headphone spill that was audible between phrases when the track was soloed. There was also some evidence of low-end popping on certain notes, so I used low-cut EQ below 80Hz, and also added a decibel of 'air' lift at 9.6kHz. To thicken the sound, I used another instance of Vintage Warmer to add tape-style saturation and overall compression. The UAD1's Plate 140 suited the style of the track, so I went with that for the vocals.
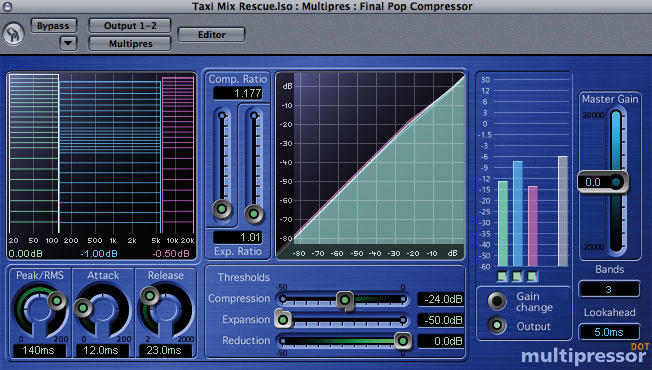 For overall processing, I used Logic 's Multipressor plug-in set up as a three-band compressor, using very low ratios and low thresholds to create a gentle overall increase in density. I then followed this up with another instance of Vintage Warmer set with 4dB of Drive (to emulate analogue tape saturation), around half a decibel of low and high boost to clarify the mid-range, and a hint of overall compression by adjusting the Knee control to around eight. The ceiling control of the Vintage Warmer was set to -0.5dB, so as to limit the output at this value and prevent clipping. The result of these two master plug-ins was to bring up the perceived level of the track and also to bind the elements together in a more homogenous way.
Before doing the final mix, it was necessary to trim the starts and ends of each track so as to exclude any audible tape hiss. I also applied fades to the very end of the last note or hit in each track to ensure the track died away to complete silence. Then it was simply a matter of playing the track through a few times to fine-tune the balance of the parts. I didn't even use automation on this particular project, though if I had been taking it further I might just have applied some very subtle level automation to certain vocal phrases and guitar parts.
On balance, I was very pleased with the final result given what I started out with, and although the recordings were done in a studio, the mix still managed to retain something of a live feel, which I liked. All three members of Taxi were pleased with the added punch and clarity of the mix, and Rob was particularly pleased with the way his vocals sounded in my mix.
Hear The Differences For Yourself!
You can hear the effects of my mixing decisions by listening to the following audio examples available for download at www.soundonsound.com/sos/apr06:
- /audio/
 originaldrums-0406.mp3
This is a dry mix of the original drum parts with no EQ or processing.
- /audio/ originalguitar.mp3
One of the original miked electric guitar parts showed some clipping distortion on the introduction that we needed to find a way to hide. The other just needed a little EQ to bring it into line.
- /audio/ originalkick.mp3
Without EQ, the original kick sound lacked any real low end so it may have been that the mic position or drum tuning was less than optimal.
- /audio/ processeddrums-0406.mp3
Here's the complete drum mix, where the kick has been treated with EQ and compression and the snare has been brightened using Logic 's Exciter plug-in. Reverb has been added using Logic 's Space Designer, and the overall drum mix livened up a little using the Noveltech Character plug-in for TC Electronic's Powercore.
- /audio/ processedguitar.mp3
The electric guitar that suffered clipping distortion was processed via the speaker-simulator section of the Waves Guitar Amp plug-in. This allowed the tonality to be adjusted, and also removed any high-frequency harmonics, which effectively hid the spiky-sounding clipping distortion.
 Some overall processing, including multi-band compression from Apple Logic's Multipressor and analogue emulation from PSP Audioware's Vintage Warmer, was applied to the main stereo mix buss to give a more polished sound.
- /audio/ processedkick.mp3
To get the kick drum sounding punchy, I had to apply a lot of low-end EQ, but care was taken not to add too much below 40Hz where it would use up headroom to no purpose. There were also some boxy resonances in the mid-range that had to be taken out using notch filters. Some boost at around 4kHz emphasised the hit of the beater. This EQ, plus a little compression, made a radical difference to the kick sound.
- /audio/ originalmix-0406.mp3
Rob's original version, mixed on his Steinberg Cubase system.
- /audio/ remix-0406.mp3
Here you can hear my final version of the mix, complete with buss processing from PSP Audioware's Vintage Warmer plug-in to add a bit of analogue-style warmth and to help the sounds gel with each other.
Need Help With Your Mix?
If you're having trouble with a mix, then you can submit your track for the Mix Rescue treatment. Contact us via the email mixrescue@soundonsound.com Please include a daytime contact telephone number, some information about how you recorded and mixed your version of the track, and your views about what aspects of your mix are causing you most concern.