When different parts compete in a mix, it isn't always easy to decide what's most important. We take you through some strategies to achieve better separation of parts for a clutter-free mix.
 It's not often you're faced with mixing an eight-minute prog/indie-rock epic, but that was the challenge that this month's Mix Rescue candidate Jacob Holm-Lupo had set himself with his song 'Beach House'. Although perhaps best known in his native Norway as guitarist for established art-rock band White Willow, Jacob had been putting together this new song for his own side-project, recording guitars and bass at home on his Apple Macbook Pro running Logic 8, and collaborating with other musicians remotely, to add vocals, keyboards and drums.

 Mike started with Jacob's guitar, which he'd identified as the most important element in the track. For the stereo layer of the main chorus guitar riff, Reaper's ReaEQ digital EQ was used primarily for cutting frequencies to deal with frequency balance issues, while Stillwell's much more characterful analogue-style Vibe EQ was used more for boosting to make more dramatic tonal changes.Finding himself with more than 40 tracks competing for space in his mix, Jacob was encountering the common problem that he couldn't get the different elements to balance the way he wanted them to: by the time the bass, guitars and vocals were forward enough, they were drowning out the drums and making them sound weedy. However, listening to Jacob's MP3 mix I was also sure there was more that could be done with the long-term dynamics to improve the sense of drama, so I asked him to send me his unprocessed multitrack files, to see if I could get a better result using my Reaper-based system.
Given the scale of this mix, it's not really possible to discuss everything I did without filling up the whole magazine (or without repeating lots of things I've said in previous columns), so I'll focus on how I tackled the main task: finding a way to balance all those competing tracks while still retaining some mix clarity.
EQ: Digital Or Analogue?
One basic tactic for improving the definition of different parts in a busy mix is simply to give each its own unique and contrasting character, and I spent a lot of time on this while mixing 'Beach House'. Some SOS readers try to achieve these contrasts mostly using the built-in digital EQ in their sequencer, and despite jagged EQ curves on every channel still find themselves unable to achieve the separation they need. The reason for this is that the simple frequency boosts/cuts incurred in this way aren't usually particularly good at delivering subjective tonal changes, however useful these EQs may be at dealing with frequency imbalances. One of the reasons why so many plug-ins now emulate vintage EQ units is that analogue equaliser circuitry tends to do much more than just adjusting a track's frequency spectrum — and it's these processing side-effects that make analogue EQ better for bringing about subjective tonal changes.
Listening to the raw tracks, I could tell that digital EQ simply wasn't going to provide enough tonal contrast, so instead I pulled up a couple of new Stillwell Audio EQ plug-ins I've recently discovered: 1973 and Vibe EQ. The former emulates the classic Neve designs I cut my teeth on years ago, and the latter is another vintage-inspired, analogue-style algorithm that really lays on the 'vibe' with a trowel. The bass and snare parts benefited from the slightly smoother sound of the 1973, while Vibe EQ's aggressive edge really helped to bring out the best in the most important guitar and keyboard parts, including the crucial main chorus guitar riff.
If you've looked at the screenshots in my previous Mix Rescues, you'll see that I tend to avoid boosting with standard-issue digital EQ plug-ins: I'm not a great fan of the sonic side-effects of boosting with digital EQ (especially at the top end), and given that you typically boost sections of a sound that are important, this concentrates digital nasties in the least desirable places. When it comes to good analogue EQ, the processing side-effects are usually designed to be more musical, and can add that elusive extra 'zing' that sets a sound apart in the mix. So I concentrated on boosting when using the 1973 and Vibe EQ, because I was after as much sonic personality as I could get.
For example, on the primary layer carrying the main guitar riff I used a +2dB peak at 1.2kHz, a +6dB peak at 3.2kHz, and a further 6dB of boost using the 12kHz high shelving band. I'd never normally go for anything like this setting with a built-in sequencer EQ, because it would just have sounded harsh. As it was, the result was certainly very cutting, but not abrasively so. If you're wondering why I used the 12kHz shelving boost, given that guitar cabinets don't produce much information above 5kHz, it's worth pointing out that the effects of an analogue high shelving filter can extend down well into the mid-range in practice, and in this case the boost made a useful subjective difference. The downside of the high shelving, of course, was an increase in the noise levels (and indeed the levels of some digital clipping in the recording), but neither of these potential technical gremlins turned out to be much of an issue once the whole arrangement edifice was in place.
Despite the advantages of analogue-style EQ in situations where you really want to change the nature of a given sound, though, I still used Reaper's built-in ReaEQ for the vast majority of my EQ processing, even for this mix. Not only is it much more efficient on processor resources, but I also find this kind of EQ good for tackling simple frequency-balance problems without significantly changing the tone of each sound. So, for example, when the low end of your acoustic guitar is getting in the way of the bass or vocals in a mix, you can use digital EQ to just reduce the level of the acoustic guitar's low frequencies without really adjusting its overall timbre a great deal. For some of the tracks on 'Beach House' I combined both types of EQ, applying the more analogue-style processing to get the right tonality, and then supplementing it with ReaEQ to dip out any frequency regions that were causing conflicts with other elements of the mix. Different types of EQ do different jobs, so it's worth using each for what it's good at.
Rescued This Month...
Jacob Holm-Lupo is a guitarist and songwriter based in Norway, who has released five albums and toured Europe and the US with his prog-rock group White Willow. He's now preparing the first album with his new project The Opium Cartel, calling on the talents of a wide range of international musicians. For this month's song 'Beach House', the line-up included the English singer Rhys Marsh, Lars Fredrik Frøislie playing a mouth-watering selection of vintage keyboards (Mellotron, Minimoog, Arp Solina, Korg Polysix, Roland VP350 and Clavinet!) and Mattias Olsson providing drums, percussion and various other instruments from his home studio in Sweden.
Beyond EQ


 To get the bass notes to cut through the guitars during the choruses, and also to subjectively support the mid-range of the guitar sound, Mike mixed in a distorted channel with the bass part. MDA Combo and GVST GClip provided the raw distortion sound for this channel, while Stillwell Audio's 1973 analogue-style equaliser and Reaper's built-in ReaEQ digital equaliser sculpted the tone of the distortion and helped slot it into the right place in the mix.Equalisation, of whatever type, was only part of the recipe for the 'Beach House' remix. Even good analogue EQ has limits in terms of how far it can adjust the tonality of a sound, and with so much going on in the arrangement I needed more options. One of my stalwart effects in this kind of situation is distortion, and I ended up using it in a number of guises here. The great thing about distortion is that it adds frequencies that weren't there in the first place, which makes it great for thickening anaemic frequency regions in any given sound. It also often results in a reduction of the sound's overall dynamic range, which can help secure the sound's place in the mix.
In some instances I took the straightforward approach of just inserting the distortion directly into the channel in question. So, for example, one of the layers comprising the first guitar solo (after the second chorus) went through both Silverspike's Ruby Tube and Schwa's Oligarc Drive; the Mellotron choir sounds at the start of the breakdown went through MDA's Combo; and a Polysix keyboard part during the outro went through Heeb's Crunch Dude guitar amp simulator. Distortion plug-ins all sound different, so it's important to experiment to decide which will give you the sound you want. With Jacob's guitar part, I wanted to smooth out and thicken the line with Ruby Tube's limiter function, but then found that the high end was a little too harsh, so added in the warmer-sounding Oligarc Drive (with its Brick Limit function switched in, too) to remedy this. The MDA Combo plug-in was used specifically for its Radio mode, which I find really useful for making stuff sound much harder and more compact — ideal for improving audibility without taking up lots of space in the mix. For the outro section I threw caution to the winds and tried all sorts of little plug-ins that I'd not used before, just to find some mad new timbres. Many of these I just as quickly chucked out again, but some twiddling with Crunch Dude gave me something promising for this part, and I then knocked it into final shape using some EQ and limiting.
There are times, though, when using distortion as an insert effect is too restrictive, because it doesn't give you enough control over the added distortion frequencies. For this reason I took a parallel processing approach for some of the tracks in this mix, most notably the bass part. What I wanted was some extra mid-range energy to subjectively bolster the chorus guitar sound, as well as making the bass line more audible on smaller speaker systems. By setting up a distortion process in parallel to the main bass signal, I could then EQ that distortion signal to isolate just the frequencies which would be useful, and then mix in only as much as I needed. This approach also let me automate the distortion levels to suit the different sections of the song as a whole, which helped the verse-chorus transition.
In most sequencers you would set up parallel distortion processing using a distortion plug-in as a send effect, but one of the things I like about Reaper is that you can set up even very complicated parallel processing within a single mixer channel, assigning plug-ins to the distorted and undistorted paths at will, and then further processing the combined result if you like. So, whereas in Cubase I'd need a normal mixer channel for my bass track, an FX Channel for my send effect, and then a Group Channel to combine them, I can roll all these functions together within a single channel in Reaper, which makes life a lot easier when I'm working on large-scale projects like this.
Drum-processing Tricks
For the drums on 'Beach House' I used a few less common little processing tricks which you might find useful. The first was to do with the kick-drum sound, which was actually a combination of the miked kick drum and a sample that Jacob had triggered alongside it to give it more impact. The sample was certainly punchier than the miked sound, so I decided to major on that, but the kick mic's mid-range still turned out to be useful for tying the sampled kick into the kit sound as a whole, so I high-pass filtered the mic signal and mixed it in. Because there was quite a bit of spill on the kick mic, it made sense to gate it, but rather than triggering the gate from the kick mic's channel, I triggered it from the sample channel, which made the gating action completely bomb-proof (there were no real dynamics to the sample part), and ensured that the onset of the sampled and real sounds was always absolutely locked together, for maximum punch.
Because I wanted the bass quite prominent in the mix, I also found that it was fighting for space at the low end with the kick drum. One solution might have been to shoe-horn each instrument into its own frequency region with EQ, but this tactic wasn't tremendously helpful here because of the wide pitch-range of the bass part — it was like trying to hit a moving target. So instead I opted to duck the bass part a little whenever the kick drum played, allowing me to fade up the kick drum further without the combination of bass and kick becoming over-porky. There are lots of different ways you can implement ducking in Reaper, but I chose to use the built-in ReaComp plug-in on the bass track, triggering it from the kick sample part and setting it to knock 5-6dB off the bass level with each kick hit.
The overheads were another fairly labour-intensive element of the drum sound, as they needed to have an awful lot of sustain in order that the cymbals would carry over the general guitar/keyboard onslaught in the choruses. Working within the overhead channel's effects matrix, I processed them with parallel compression first, and then combined the compressed and uncompressed signals into a further compressor, before sending them on to their own medium reverb (out of which I'd taken some low end to make it more prominent on the cymbals). That's a lot of stages of processing for one goal, but I tend to find that, when you're looking to make a big difference, it's better to do moderate amounts with several processors than risk pushing a single plug-in beyond the point where it sounds good.
Psychoacoustic Enhancement & Effects For Clarity
Parallel distortion processing is also at the heart of another effect that I used a fair bit in this mix: Aphex-style psychoacoustic enhancement. The Aphex Aural Exciter processors use a scheme whereby some high frequencies are siphoned off the processed signal, distorted to introduce extra harmonics, and then mixed back in with the unprocessed signal. This kind of enhancement process brings sounds to the front of the mix and emphasises their details, which makes it a popular choice for lead vocals — and I used it on the lead vocals in the chorus of this song. However, I also turned to it for a number of other parts that I wanted either to bring to the front of the mix (such as some of the solo guitars) or to brighten radically (including some of the keyboard parts, especially in the all-guns-blazing outro section).
. The latter was treated with two distortion plug-ins, two EQ plug-ins and an automated fader, before it was recombined with the original, undistorted signal. Finally, this mixed signal was sent to another compressor, which was used to duck the bass part by a few decibels whenever the kick drum played.") Here you can see how the processing was applied to the main bass DI part, using Reaper's routing facilities to incorporate the parallel distortion channels within the single mixer strip. Following EQ and compression plug-ins, the signal was split into two stereo streams (1+2 and 3+4). The latter was treated with two distortion plug-ins, two EQ plug-ins and an automated fader, before it was recombined with the original, undistorted signal. Finally, this mixed signal was sent to another compressor, which was used to duck the bass part by a few decibels whenever the kick drum played.Such processors usually have three main controls. One (called 'Tune' on the Aphex boxes) sets the frequency above which sounds are treated with the parallel distortion process, the second adjusts the amount of distortion ('Drive'), and the third specifies the amount of distorted signal mixed back in ('Mix'). It's worth spending enough time setting up these controls, as any of the three can quickly cause problems if inappropriately adjusted. Too low a Tune setting can cause real sibilance problems on vocal parts, for instance, while excessive Drive or Mix levels can make a mix unpleasantly tinny and fatiguing to listen to. What makes configuring this effect more difficult is that our ears get acclimatised to it very quickly, so it's very easy to push it too hard without realising.
Here you can see how the processing was applied to the main bass DI part, using Reaper's routing facilities to incorporate the parallel distortion channels within the single mixer strip. Following EQ and compression plug-ins, the signal was split into two stereo streams (1+2 and 3+4). The latter was treated with two distortion plug-ins, two EQ plug-ins and an automated fader, before it was recombined with the original, undistorted signal. Finally, this mixed signal was sent to another compressor, which was used to duck the bass part by a few decibels whenever the kick drum played.Such processors usually have three main controls. One (called 'Tune' on the Aphex boxes) sets the frequency above which sounds are treated with the parallel distortion process, the second adjusts the amount of distortion ('Drive'), and the third specifies the amount of distorted signal mixed back in ('Mix'). It's worth spending enough time setting up these controls, as any of the three can quickly cause problems if inappropriately adjusted. Too low a Tune setting can cause real sibilance problems on vocal parts, for instance, while excessive Drive or Mix levels can make a mix unpleasantly tinny and fatiguing to listen to. What makes configuring this effect more difficult is that our ears get acclimatised to it very quickly, so it's very easy to push it too hard without realising.
Another approach I used to try to differentiate the individual parts was applying different effects processes to them. So, for example, the first solo guitar line after the second chorus had some of Schwa's Oligarc Phaser added to it to differentiate it from the main chorus guitar riff, while the subsequent string-bend solo used a distorted panning delay courtesy of the Smart Electronix MjRotoDelay and MDA Leslie plug-ins. A big room ambience patch from Silverspike's Room Machine 844 also helped make the snare more audible, by increasing its stereo width and sustain.
As far as global send effects were concerned, though, I steered clear of adding much in the way of general reverb, simply because it would have clogged up the already packed-out arrangement, so I employed mainly a simple quarter-note stereo tempo delay, feeding it from a dozen or so of the tracks. Obviously, there's the very apparent and artificial-sounding reverb I applied as a special effect to the lead vocals in the verses, but I knew I could get away with it there, because there was lots of space free in the track. Needless to say, I pulled the level of that reverb right back for the choruses! A little three-sixteenths ping-pong delay patch was handy for the vocals and some rhythmic effects in the verses, just to help give things a slightly trippier atmosphere, but again this featured not at all in the choruses, and only showed up again for some of the parts in the final breakdown mêlée.
Multing Multiplication
I mentioned at the outset that Jacob's arrangement comprised 41 separate tracks. This quickly expanded to 50 once I starting working through them, because some tracks contained more than one musical part — and while it's very tempting to use one track per instrument, it's actually more useful, when mixing a dynamically changing arrangement like this, to split, or 'mult', the different musical parts to separate sequencer tracks, even if they're performed on the same instrument. This allows you to choose processing and effects to suit each part, which can really help improve the contrast between different sections of your mix. You could, of course, use automation to achieve the same result, but in a lot of cases multing is a lot less faff than automating a dozen parameter changes for each section boundary.
Stereo Placement
If you read my Sounding Off column back in the March 2008 issue of Sound On Sound, you'll be aware that I'm not tremendously hung up on exact stereo positioning while mixing. However, that doesn't mean that I'm not interested in the stereo field at all, and I actually spent quite a bit of time while I was working on 'Beach House' experimenting with the stereo width, distribution and movement of many of the parts to create the final mix. While doing this, I made extensive use of one of my favourite (and most simple) plug-ins: Voxengo's MSED. This little utility allows you to convert between Left-Right and Middle-Sides stereo signals, but also has an Inline mode that encodes L-R to M-S, and then gives you control over the levels of the encoded channels before decoding them back to L-R format. In practice, what this means is that you can increase and decrease the stereo width of a track simply by altering the ratio between the Middle and Sides channel levels.
I used this plug-in nine times on this one mix alone, most prominently on the main chorus guitar riff, widening the stereo to clear more space in the middle for the bass, kick and snare, and the guitar counter-melody at the start of the second chorus. A subsidiary layer of the main guitar riff was in mono, and rather than panning it to one side I decided that I'd use a little dodge to fake an opposition panned double-track. Again using Reaper's channel-effects routing functions, I sent the guitar to both the left and right channels of the mix, but treated only the right channel with Reaper's little ReaVerb convolution plug-in. Loading up a tiny 30ms-long impulse response (which sounded like a concrete tube) with a pre-delay of 10ms or so instantly spread the guitar sound to the extremes of the stereo image, giving the overall layered sound a much more 'widescreen' effect and keeping the centre-ground free of clutter.
Order! Order!
There's more to making sense of a busy mix than processing, though, because the way you build up the tracks while mixing also makes a big difference to the success of the results. My recommended tactic is to start with what is sonically the most important track, and work your way progressively through to the least important. The choice of the most important part isn't always as obvious as you might think, though. For example, although the lyrics of a rock track might be important, the actual sound of the vocal might not be nearly as crucial as, say, the power of the rhythm section — and if you give the vocal sound too much room to shine, it's going to trespass unduly on your rhythm-section sound.

 Because the arrangement was already so full, only two reverb send effects were used: the first a room simulation from Silverspike's Room Machine 844, which was used mainly to give the drums and percussion parts some sense of communal space, and the second a long, bright special effect patch from DaSample's Glaceverb, which was used primarily for the verse vocal line.It's quite common to start with drums, bass, or lead vocals when mixing in most styles, but the remix of 'Beach House' was a bit unusual in this regard — because I decided to start with the main guitar riff which enters in the chorus. It was this riff which seemed to me, above anything else, to bring about the big dynamic contrast between the verses and choruses, so I wanted it to sound as biting and powerful as possible, despite the legion of other competing parts. Working with this riff on its own, I could concentrate on getting it sounding exactly as I wanted, without being restricted by mix balance issues, and because I was starting with that track I could freely experiment with processor-intensive plug-ins to get the best results for such a vital part.
Once I was happy with that sound I introduced the what I thought was the next most important part — the bass — which I tried to process to get sounding as good as possible without compromising the guitars. The low mid-range was sounding a little bloated, so I cut some of that from the bass to make more room (I could have cut the guitar parts instead, but I'd already decided that they were more important!). From there I moved on to drums, then vocals, other guitars, and keyboards, each time checking that I wasn't trampling over essential characteristics of the previous tracks. It's inevitable when working this way that you'll have to resort to more drastic processing to squeeze the less important parts into the mix, and I used less CPU-heavy plug-ins the further along I progressed, as there's little need for audiophile processing on parts that are obviously destined for the background. As I reached the last tracks, space in the mix began to become very limited, and I ended up muting a couple of the least important parts, simply because there seemed to be no way to make them audible without compromising more important parts.
So let's recap the advantages to this basic approach. Firstly, you can use good-sounding plug-ins well within their comfort zone for the most important tracks, leaving drastic or 'CPU-efficient' processing for the least important. Secondly, it's always pretty clear which part to process when any two parts conflict, so you don't get into problems with subsidiary parts outshining the primary ones. And finally, it's easier to decide when the time has come to exercise the mute buttons: an important mixing decision that I know proves difficult for some SOS readers!
Clutter-free Mixing
As I said at the outset, there was much more to this mix than I've been able to cover here, but by going into detail about my strategies for dealing with the central challenge that Jacob faced, I hope I've demonstrated some of the different ways that you can improve the clarity of your own mixes when the arrangement gets complicated.
Remix Reactions
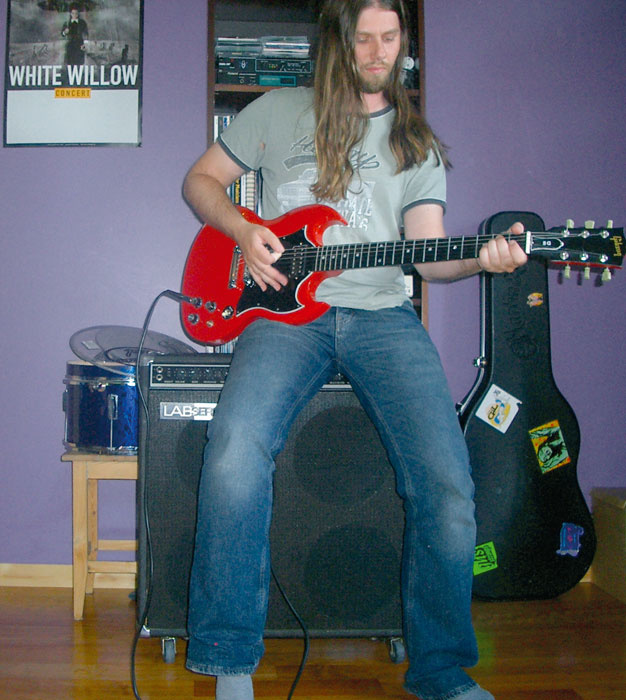
 This month's Mix Rescuee, Norway-based Jacob Holm-Lupo.Jacob Holm-Lupo: "I never set out to do a proper mix of this song, since I'll usually leave the mix of the album to someone else, but all the same I wanted functioning rough mixes of as many of the songs as possible. This is one of the denser and rockier tracks, and I felt that I was unable to maintain the punch and crunch of the song with so many instruments battling for space. If I tried to make the guitars more forward and aggressive, the drums got lost and sounded muffled and feeble. Likewise, up-front drums drowned out the vital guitars in the chorus. Basically my challenge was to maintain both clarity and instrument separation, while still having solid amounts of punch and power; a challenge I passed on to Mix Rescue! I was eager to learn how a professional mixer deals with a layered and dense track without losing the track's momentum.
"My response to Mike's mix is: I'm speechless! The separation of the instruments is excellent, but the chorus still hits you like a fist. The drums pack a lot of punch, but due to whatever EQ or dynamic trickery Mike's been up to, they stay out of the way of the guitars, which are way forward, crunchy and crispy. I am also impressed with the sense of space he's managed to create. Some nice delay effects are swirling around in the background of the verses, creating a nice ambient atmosphere behind the lead vocal, and when the chorus comes in, Mike's panning job makes it seem like an entire panorama unfolds before my ears — very impressive. I also like the intro, where he's emphasised the Polysix piano-like patch and given it rhythmic interest with delays. The intro really builds a sense of suspense before the first verse starts. Finally I was glad to hear that the bass guitar has found its place in the mix. It sounded too thick in my original mix, but Mike managed to give it its proper place while still retaining the thrust it originally had. Everyone who contributed to this track is very impressed with Mike's mix — and more than anything we're looking forward to reading the article so we can steal his tricks!"
Hear The Difference!
You can hear the 'before and after' mixes, as well as some of the individual files before and after Mike applied any processing, on the SOS web site at www.soundonsound.com/sos/sep08/articles/mixrescueaudio.htm