 and a mic in front of the kit (bottom track). This allowed a more even cymbal and hi-hat balance to be achieved, albeit at the expense of a snare drum sound that varied slightly between different sections of the song.") The main drum 'overheads' sound was created by using fader automation to balance between two different mics in real time — a mic above and behind the kit (top track) and a mic in front of the kit (bottom track). This allowed a more even cymbal and hi-hat balance to be achieved, albeit at the expense of a snare drum sound that varied slightly between different sections of the song.
The main drum 'overheads' sound was created by using fader automation to balance between two different mics in real time — a mic above and behind the kit (top track) and a mic in front of the kit (bottom track). This allowed a more even cymbal and hi-hat balance to be achieved, albeit at the expense of a snare drum sound that varied slightly between different sections of the song.
Drum-recording problems and an inappropriate choice of vocal mic threatened to hamper this month's New York hard rock track.
When it comes to recording drums, if you can get the overheads right, you're pretty much home and dry. It's when something's out of balance in the overheads that mixing really starts to get complicated — as with this month's Mix Rescue, 'Drink From My Cup', by New York rock band Generals & Majors.
The closest thing to overhead mics in the band's recording setup were an AKG C414 XLII in front of the kit and a Groove Tubes GT57 above and behind it. Apart from making a stereo drum sound unworkable, the two mics also gave two different, problematic representations of the cymbal and hi-hat balance. The front mic was picking up a great deal more sound from the hi-hats than from the rest of the cymbals, and the C414 XLII's pronounced high-frequency peak (roughly 5dB between 3kHz and 15kHz in cardioid mode) was making it sound particularly harsh. The mic behind the kit, although giving a slightly better hi-hat/cymbal balance, left all of the cymbals rather low in level compared to the snare drum.
Unfortunately, there was no help to be found in the close mics, as these were all on the drums: SM57s above and below the snare, as well as on each tom-tom, and an Audix D6 in the kick. A close mic on the hi-hat would not have helped a great deal, admittedly, given that it was already too loud, but some mics over the cymbals might have offered some kind of 'Get Out Of Jail Free' card. Here you can see the SIR reverb Mike applied to the overhead mics to smooth out and widen the cymbal sound. A fairly long hall impulse response had been adapted with a slow-attack envelope to provide a nice reverb wash without obvious early reflections. This has then been steeply rolled off below about 2kHz, using the plug-in's built-in filtering, to restrict the effect mostly to cymbal frequencies.
Salvaging An Overhead Sound
My first instinct was to ignore the front mic and work with the rear one, using limiting to duck the snare hits and thereby increase the cymbal levels. However, it soon became apparent that none of the cymbals were coming across nicely enough in that mic alone, no matter what I tried with EQ, and they only began to sound better with the other mic added in.
Taking a different tack, I removed all my rear-mic processing and instead heavily compressed the front mic to try to even out the cymbal levels, mixing it in with the rear mic just enough to increase the cymbal levels. I had more luck with this approach, and even began building the rest of the mix around it. It all had to be unravelled, though, because I eventually had to admit to myself that the heavy compression was causing too many undesirable side-effects, without giving enough control over the hi-hat levels.
Back once more to the drawing board, I decided to leave the mix for a couple of days to mull over other options. I had noticed in my previous experiments that, although I could get individual sections of the song sounding all right on their own by balancing the levels of the front and rear mics, the settings didn't carry from one section to the next. It dawned on me that level automation might be the answer — I'm not used to starting a mix with the fader rides, but there's a first time for everything!
 worked better in the mix with a bit of high-pass filtering, although each needed a different filter cutoff frequency. Cuts at around 350Hz and 2.5kHz on the rhythm guitars removed a bit of low mid-range muddiness and also reduced masking of the lead vocal's important presence region.") All three guitars (two rhythm tracks and lead) worked better in the mix with a bit of high-pass filtering, although each needed a different filter cutoff frequency. Cuts at around 350Hz and 2.5kHz on the rhythm guitars removed a bit of low mid-range muddiness and also reduced masking of the lead vocal's important presence region.
All three guitars (two rhythm tracks and lead) worked better in the mix with a bit of high-pass filtering, although each needed a different filter cutoff frequency. Cuts at around 350Hz and 2.5kHz on the rhythm guitars removed a bit of low mid-range muddiness and also reduced masking of the lead vocal's important presence region.
Completely removing all my previous processing, I found that simply automating the balance between the two mics throughout the song already got me a long way, although in the two verses, where Jimmy Majors really gives the hi-hat a whipping, I had to drop the level of the front mic by about 12dB to keep things in check. The cymbals were now coming together, and narrow EQ dips (5dB from the front mic and 2.5dB from the rear mic) at 14kHz took the worst of the edge off the hi-hat sound, so my attention shifted to how the overheads were presenting the snare.
Even after I'd pulled down some undesirable low-mid ringing with a few EQ notches in the 300-600Hz region, the drum was still too loud and too dull-sounding. Shifting the balance back in favour of the cymbals was a fairly simple task using fast-release limiting, but it meant that I needed to be able to compensate for the inevitable loss of snare attack with a brighter-sounding close-mic signal.
Listening to the top snare close mic, it was bright enough and had a very sharp attack, but it didn't really have any sustain to it beyond a number of prominent ringing overtones. In addition, it seemed that either a pack of gerbils was periodically stampeding across the mic capsule, or the mic had been placed in the path of the air blasts generated by the hi-hats opening and closing (depending on the type of rock band, it could be a tough call).
The under-snare mic was also fairly bright and not too ringy, and had a nice snare buzz to it, so it seemed that I might be able to press it into service. However, even with the overheads gently high-pass filtered to tone down the low end of the snare sound, mixing in the close mic didn't really reinstate what I'd hoped for. Some of this was down to those 350-650Hz resonances, but the drum was also just sounding a bit thin and polite (a bit like me, really), so I popped in an overdrive plug-in to give it a little more attitude — a fairly common rock mixing trick.
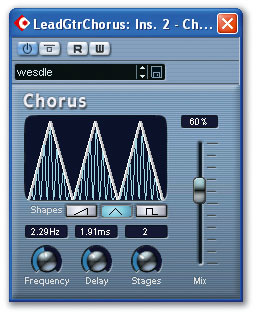
 To create a deliberately '80s sound for Richie Majors' guitar solo, Mike combined a straight tempo-sync'ed delay from Cubase's Mod Delay plug-in with a chorus effect comprising Mod Delay and Chorus plug-ins in series.

 Fiddling with different amounts and types of overdrive began improving things, but the snare was still sounding a bit 'stuck on' to the kit, so I loaded a dense tiled-room impulse response into the SIR convolution reverb plug-in and used this to blend the three mics together. Because I didn't really want a 'reverb effect' sound as such, I shortened the effective decay time via SIR 's impulse envelope controls and pulled back a bit of high end. I also cut some low frequencies, to keep the low end of the mix clear.
The Audix D6 provided a nice, solid sound, which was initially fine without any processing, so I moved on to the tom-tom mics. The tracks had already been silenced where the drums were not in use, so I first expanded the tracks with Digital Fishphones' Floorfish, to keep the levels of spill during the remaining bits of audio from giving away the edit points. Listening to the tom sound in the overheads, the lower toms mostly needed weight, so I gently low-pass filtered two of the close mics to achieve this, adding a dash of the SIR reverb to settle them down into the mix as a whole. Given that the overheads were in mono, I made no attempt to try to recreate any stereo image with the close mics, leaving them all panned dead centre.
Guitars & Buss Processing
The DI'd bass track already sounded pretty good, although, like a number of the tracks, it was clipped in places, and there wasn't anything much I could do about this. A medium compression setting from Digital Fishphones' Blockfish kept the levels nicely under control, and I also used the Saturation control to thicken the sound, which otherwise seemed a bit too 'wiry'. The two rhythm guitars (overdubbed using a Fender Blues Deluxe, miked up with a Shure SM57) were also in fairly good shape, but needed a little gentle high-pass filtering to prevent them from interfering with the bass. The lead guitar, using a Marshall stack (again recorded with an SM57), needed its high-pass filter set much higher, at around 250Hz, to allow me to fade it up enough without over-emphasising the lower mid-range of the mix.
Calling up another instance of SIR, I used a sparser-sounding short impulse response to give the two rhythm guitars a slightly more 'live in a garage' feel, which seemed appropriate, and panned the guitar tracks half left and half right for some stereo width. Because the guitar parts were tonally quite different, I panned the reverb sends to opposite sides of the stereo field, to try to blend the two together and improve the balance between the left and right channels.


 The AKG C414B XLII vocal mic used for recording lead singer Rat Bite was emphasising plosives and sibilance without delivering enough presence, so Mike filtered out the low end to reduce the popping, de-essed with Digital Fishphones' Spitfish, and added a presence boost at around 3.3kHz. Rat Bite's movements while singing also meant that the vocal tonality was inconsistent through the track, but careful two-band compression was able to even this out.In the light of the type of bands that Generals & Majors were name-checking, I decided to go for a slightly '80s lead-guitar sound, and combined a simple tempo-sync'ed delay line, band-pass filtered at around 2kHz, with a chorus effect courtesy of Cubase 's Mod Delay and Chorus plug-ins in series. Using a little automation, I increased the lead-guitar level during the solo, while simultaneously upping the effect levels — basically the mixing equivalent of throwing a guitar shape...
With a track as aggressive as this I knew that I wanted that rather 'hand-to-hand combat' feel, which pumping buss compression over the whole mix can provide. However, it's very difficult to judge the levels of drums against the guitars before this processing is in place, so now was the time for me to set to with Cubase 's VST Dynamics plug-in. The main thing to remember about pumping compression is that it's all to do with the compressor's release time, which usually has to be within a window of around 100-200ms, depending on the speed of your track. Here I found 150ms to be about right, working with an attack time of 10ms and a 3:1 ratio. As for the Threshold setting, I continually adjusted this as I worked, in order to maintain an appropriate amount of gain reduction (in this case around 4-5dB on peaks) as my mix balance changed.
Compensating For The Wrong Vocal Mic
Vocals were another challenge, because they had been recorded with the AKG C414 XLII. Although this is a great mic (normally one of my favourite vocal mics), it really wasn't the right choice here, as it emphasises sibilants and lacks the kind of presence required to project the singer past the drums and electric guitars. It also sounded as though the mic was positioned too close, so the C414 XLII's extended LF response was combining with proximity bass boost to cloud the sound and, of course, this meant that the pop shield couldn't really do its job properly.
High-pass filtering at around 170Hz and a boost of a few decibels at 3.3kHz improved the tonality, but the sibilance was still a problem, so I dialled in Digital Fishphones' Spitfish de-esser to address this, using the side-chain listen mode to home in on the right frequencies. Here, the sibilant region was unusually high in the frequency spectrum, probably because of the C414 XLII's characteristic high-frequency boost.
As I continued to work with the lead vocal, it became apparent that the singer had also been moving in relation to the mic, which meant that the tonality and, in particular, the amount of proximity bass boost were actually varying all the time. I considered trying to automate the high-pass filter's cutoff frequency in the first instance to sort this out, but quickly realised that I'd probably have a beard to rival Rick Rubin's before I'd finished. So instead I called up Cubase 's multi-band compressor, splitting the frequency range into two bands crossing over at 750Hz, and compressing both with comparatively high ratio and threshold settings, in search of a more consistent tone.
A certain amount of tweaking of the settings was required before I managed to come up with something I was happy with, at which point I duplicated the EQ, de-esser, and multi-band compressor settings for an accompanying lead-vocal double-track, and sent from both tracks to the same delay and chorus effects that I'd already set up for the lead guitar. The delay helped to blend the vocals with the mix without distancing them from the listener (as reverb would have done), while the chorus just made them sound a bit more three-dimensional and hi-fi. To give a bit more width to the sound in the choruses, I treated the two lead vocal tracks a little like the rhythm guitars, panning them a little left and right while panning each delay send to the opposite side, whereas elsewhere I left everything panned centrally.
In addition to the two lead vocals, there were a couple of low backing vocals that exhibited the same sibilance problems, so I immediately slapped some de-essing on those. However, because these parts were only really in a supporting role, I simply high-pass filtered them at 150Hz and heavily compressed them to nail down their mix levels, rather than getting into more detailed processing, such as that which I'd used on the lead vocals. Applying a higher level of the tempo-sync'ed delay effect to the backing vocals pulled them behind the lead vocals, whereupon I finally had all the tracks running together.
Nips & Tucks
Returning to the mix the following day (with box-fresh ears and some suitable reference material), I noticed straight away that I'd let the mix get a bit muddy overall, so I dipped the 350Hz region of the kick drum, bass, and rhythm guitars to reduce this. A listen back to the band's original mix led me to suspect that they might want a brighter cymbal sound than I'd initially gone for, so I applied a few decibels of shelving boost above 8kHz on both overhead mics from Cubase 's Q plug-in. This didn't get me all the way there, though, because it turned out that the lead vocals were still a bit too bright, putting the cymbals in the shade, so I cut a decibel off both vocals with a shelving filter at 12kHz. While I was comparing the sound of the band's original mix, I also cut 3dB off the bass track using a high shelf at 150Hz to move a little closer to the former, subbier sound.
The kick drum still needed a bit of work. Although it sounded fine just in the context of the drum kit, it was getting lost amidst the guitars in the mix. I wanted to have the kick drum fairly close to the front, so that it would drive the song forward, but when I faded it up it ended up hitting the output buss compressor too hard well before it was slicing through the mix.
The first way I attacked this problem was by using Kjaerhus Audio's Classic Compressor, setting its attack time to around 20ms and thereby reducing the level of the sustain portion of each hit in comparison to its attack transient. Combining this compression with a bit of high-pass filtering and a hefty 7dB boost at 1.6kHz gave a much tighter sound, which I was able to bring to the front of the mix without problems.
The band included with their audio files a track where a sample had been triggered from the kick drum. Their choice of triggered sound wasn't really as good as the actual kick-drum recording, though, so I barely used this track in my final mix, high-pass filtering it at 300Hz just to increase audibility on small systems. The triggering was extremely unreliable as well, so a fair bit of editing was required to remove samples spuriously triggered by snare and tom spill.
Although I liked the sound of the guitar tracks, they were dulling the lead vocals by masking the important presence region. I'd already EQ'd the vocal tracks to sound fine in the less full-on sections of the track, so I didn't want to change these settings. One solution would have been to automate the lead vocals' EQ settings, but it turned out to be much simpler to cut at around 2.5kHz on both rhythm-guitar parts, thereby reducing their masking effects in this region — just a couple of decibels did the trick.
As everything began slotting into place, I increasingly began to feel that the overall sound still needed more subjective power and size. In particular, the drums didn't seem to be played quite evenly enough to sustain the pretty relentless onslaught required by the song, and they weren't really gelling with the guitars well either. To even up the performance a little, I inserted limiters on the five close-mic tracks, keeping the Threshold controls high enough so that the limiter tickled most hits with only a couple of decibels of gain reduction. What it is important to mention, though, is that I didn't want to change the actual sound of these drum hits dramatically, so I made sure the release times were set long enough to allow the whole drum hit to pass by before the limiter began resetting its gain reduction (around 200ms). This kind of processing is not something I'd normally recommend, because it robs you of performance dynamics but, in this case, these kinds of refinements were clearly secondary to the need to shuffle the listener's internal organs!
More referencing of commercial recordings showed that the main drum reverb I'd chosen wasn't working as well for the cymbals as it was for the rest of the kit, so I added in a fairly standard 2.5-second hall reverb, high-pass filtered at around 1.5kHz specifically to give a bit more smoothness and splash to the top end of the overheads. I had to adjust the attack phase of the impulse envelope and cut a couple of decibels at 14kHz from the effect return before this worked, but it spread out the cymbals surprisingly well. Still not entirely convinced, though, I also sneaked in a little surreptitious parallel compression (similar to that used in SOS February 2006's Mix Rescue) on these tracks, again with the return channels high-pass filtered to thicken mostly the cymbal tails.
Blending the kit with the guitars took just a pinch of the drums' tiled-room ambience on the guitar tracks, so all that remained was a handful of vocal and guitar fader rides required to keep the balance tight between the different sections. I'll admit to a hint of trepidation as I emailed an MP3 of the remix to the band, because I'd deliberately driven everything in this mix pretty hard, so it was something of a relief to hear from them that I'd not taken things too far! At their request, I added a few extra automation moves and dealt with the odd timing issue on one of the guitars, but then it was a wrap.
Rescued This Month...
 Generals & Majors are a five-piece band who have been causing a stir in the clubs of New York with their high-energy rock sound. Formed by the two songwriters JG General (bass) and Jesse General (rhythm guitar), who grew up listening to Guns 'n Roses, Thin Lizzy, AC/DC, Kiss, and the Stooges, the line-up also features Jimmy Majors (drums), Richie Majors (lead guitar), and Rat Bite (vocals). Last summer the band recorded a nine-song debut in an abandoned farm, cutting all the tracks live. If you fancy checking out some of their other tracks to find out why Spin magazine said "rock fans looking for a swift kick in the groin these days need look no further," check out their page on the Myspace website: www.myspace.com/generalsampmajors
Hear The Differences For Yourself!
The following audio files demonstrate some of the mix processing I used to create my remix. You can listen to or download these at:
www.soundonsound.com/sos/apr07/articles/mixrescueaudio.htm
 originaldrumsfrontmic-0407.mp3 and originaldrumsrearmic-0407.mp3: These are the raw recordings from the closest thing the band had to overheads: one mic placed in front of the kit, and another mic above and behind.
- automatedoverheadsmix-0407.mp3: The remixed drum sound was based on this basic overheads mix, created by balancing the two overhead mics together under automation control. A little EQ cut at 14kHz was used to make the hi-hat sound less edgy. Notice that the snare sound changes in real time as a side-effect of the automation.
- processeddrums-0407.mp3 and processeddrumslarger-0407.mp3: These two files solo the full remixed drums, but the first file doesn't include two of the effects I used to get more size later on in the mix process: high-pass-filtered hall reverb and parallel compression.
- originalleadguitar-0407.mp3: The original lead guitar part was very muddy, and therefore couldn't be faded up to a suitable level without clouding the whole mix.
- processedleadguitar-0407.mp3: High-pass filtering cleared out the low-end rubbish from the track and I also used some moderate compression to bring up details in the line.
- processedleadguitarwithfx-0407.mp3: Converting the processed line into something of an '80s parody was accomplished with some heavily EQ'd tempo-sync'ed delay and a chorus effect chaining Cubase 's Mod Delay and Chorus plug-ins.
- originalleadvocal-0407.mp3: The wrong choice of mic and mic placement for this voice resulted in excessive proximity effect, inconsistent tonality, and uncontrolled plosives and sibilants.
- processedleadvocal-0407.mp3: High-pass filtering, presence boost, de-essing and multiband compression work together here to compensate for the problems in the original recording.
- processedleadvocalswithfx-0407.mp3: The lead vocal and its double-track as they finally appear in the remix, complete with automated panning and the same tempo-sync'd delay and chorus effects used on the lead guitar.
- originalmix-0407.mp3: The band's own mix, as sent in to SOS.
- remix-0407.mp3: My remix from the same original tracks.
The Secret Of Easy-To-Mix Rock Drums
The difficulties I encountered with this particular project once again highlighted for me the main thing that makes rock drums easy to mix: having the right balance of the kit in the overhead mics. Of course, you need all your close mics to define a really up-front sound, but at mixdown they're the icing, not the cake. Had I only had one of the two overhead mics, I think I'd probably have thrown in the towel on this mix, because neither one offered a good balance on its own. As it was, I just had to accept some of the undesirable side-effects of the combination technique I ended up using — for example, the snare tone changes noticeably in different sections of the track as the automation shifts the balance between the front and rear mics.
The only other real problem was the lead vocals, which demonstrated how important it is to match your singer with the right mic. To be honest (and I never thought I'd find myself saying this), an SM58 would probably have worked better for this track than the C414 XLII, as it would offer less low-end extension (which caused problems), lots of presence boost without too much sibilance, and, if hand-held, a more consistent sound despite Rat Bite's movements.
Once the main problems had been solved, everything slotted into place fairly easily. However, it's worth noting that there were several situations where I ended up dealing with a problem on one track by actually EQ'ing another: vocal definition was improved by EQ'ing the guitars, for instance, while cymbal brightness was increased by EQ'ing the vocals. The more you've got going on in your mix, the more this kind of approach tends to pay off.
Remix Reactions
 JG General: "I don't consider myself a pro engineer by any measure, but because I own some gear (a portable Digi 002 rig), I've always ended up being the default producer for every band I've ever played in! For this recording, I wanted it to sound as hard-rocking and ballsy as possible. My inspiration for this jam was Guns 'n Roses, AC/DC and Motley Crüe. The problem with this scenario was that those bands had million-dollar budgets and I had just a rehearsal space and some mics. I felt that if I could get a clean signal going in, I could at least use modern technology to shape the sound on the way out. The initial mix I made was so muddled in compression and unnecessary effects (to try and get that big sound) that I lost the root of the song and it became a mess.
"I am truly surprised about the new mix. I have been getting compliments from many people on how immediate and dangerous the song sounds. The drums punch through and you can hear the kick and snare are where they need to be. The guitars are panned in a way where you can hear the clean and distorted elements to them. But the biggest surprise in this new mix is how the vocals are punchy and stand out, without sounding processed or losing the natural quality of Rat Bite's voice.
"Our band have never shied away from trying to license our tracks to get a larger audience aware of our music. In the past couple of days I have sent this mix to music supervisors and one person in particular said they felt this was something that would work well in sports branding. So perhaps you'll hear 'Drink From My Cup' one day in World Cup soccer promos! Until then, at least we have a sweet mix we can be proud of."